eFax Help Center

eFax Message Center

What is eFax Message Center?

eFax® Message Center gives you centralized access to your eFax account online anytime. The Message Center is an inbox in your eFax MyPortal, where you can view and send faxes with your electronic signature, and resend your stored faxes. You can also manage your contact lists and add “tags” to your faxes, which are keywords that you can associate with a fax to make it easier to search for later.

How does eFax Message Center Work?

Think of the Message Center as your eFax inbox, the page in your MyPortal interface where you can search for, view and forward your stored faxes.You can access the Message Center anytime, anywhere you have an Internet connection. Note: With your eFax Plus or eFax Pro account, you can also use Message Center to add your electronic signature to a fax before sending or forwarding.

From eFax Message Center You Can:

  • Create a new email message
  • Forward a fax via email
  • Resend a fax
  • Download a fax
  • Sign a fax (accepted formats include PDF, TIFF, or any of these nearly 200 file types)
  • Add a comment to a fax
  • Organize your faxes
  • Search for faxes
  • Manage your contact list
graphic-Help_Center-Message_Center

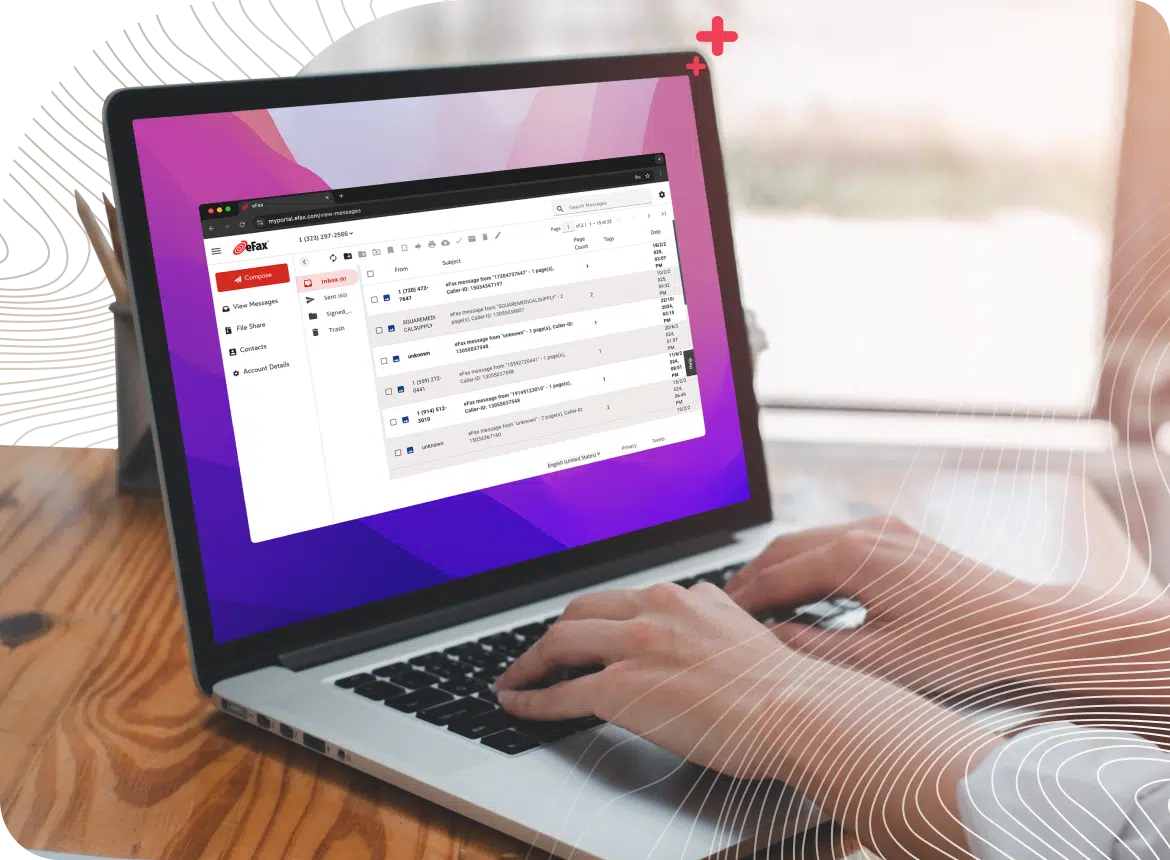
The Message Center Interface

The Message Center is divided into different panels to save you time and make faxing easy. Some panels include a toolbar with additional tools. Here is a summary of the key parts of the eFax Message Center:

folders

Folders Panel

Displays a list of folders associated with your eFax account

icon-red-browser

Folders Toolbar

Contains tools that help you manage your Message Center folders

Search

Search Box

Lets you search for your faxes received or sent through eFax

Email

Message List

Displays a list of messages in a folder selected in the Folders Panel

icon-red-browser

Message Preview Pane

Displays the first page of the fax selected in the Message list

icon-red-api-gear

Message Center Toolbar

Contains tools for organizing and working with faxes

icon-red-dashboard

Tag Panel

Lets you add or edit fax tags (for organizing and searching)

Toll-free phone number

eFax Number Selector

Lets you display faxes from other fax numbers on your eFax account

User Reports

Account Details

Takes you to your Account Overview page, where you set up Account Preferences that control how your eFax account works

support icon

Help

Takes you to the Online Help page, where you’ll find instructions on how to use eFax, get help fixing problems, and contact information for our Customer Service team

Manage Fax Contacts

Your eFax® Message Center includes an Address Book, located in the Contacts tab, which is designed to make sending faxes even easier and more convenient. You can add new contacts, manage existing contacts or import contact lists from Gmail, Microsoft Outlook® or other email programs. You can also export contacts from your eFax account to a standard CSV file, to use elsewhere. Within your Message Center Contacts tab, you can store the names and fax numbers of people you fax frequently, then simply select a specific contact you want to fax, and eFax will auto-fill that person’s contact information for you.

Add a Contact

To add a new contact to your eFax Contacts:

  1. Log in to eFax MyPortal.
  2. Click View Faxes.
  3. Click the Contacts tab at the top of Message Center. Note: Your contacts will display alphabetically.
  4. To add a new contact, click Add.
  5. In the form that appears, enter the contact details, and click Save.
Edit Your Contacts

To edit an existing contact in your eFax Contacts:

  1. Log in to eFax MyPortal.
  2. Click View Faxes.
  3. Click the Contacts tab at the top of Message Center. Note: Your contacts will display alphabetically.
  4. To edit a contact, click Edit, edit the contact details, and click Edit.

eFax makes it easy to import contacts from outside applications’ address books into your Message Center Contacts. You can import contacts in CSV format from email programs, including Gmail, Outlook, Yahoo, Hotmail and AOL.

Note: We recommend reviewing your address book for instructions on converting your contacts into CSV format, so you can then add them into your eFax account.

You can also export your eFax Contacts to a standard CSV file for backup, or for use in another address book.

Import Contacts

To import Contacts into your eFax account from another address book:

  1. Log in to eFax MyPortal.
  2. Click View Faxes.
  3. In Message Center, click the Contacts tab.
  4. Click Import in the Message Center toolbar.
  5. Locate your CSV file in the search window that appears, and click Import.
Export Contacts

To export Contacts into your eFax account from another address book:

  1. Log in to eFax MyPortal.
  2. Click View Faxes.
  3. In Message Center, click the Contacts tab.
  4. Click Export in the Message Center toolbar.
  5. In the confirmation popup, click Export to save the file to your computer. (Safari Users: You will need to option-click Export to save the file.)

Organize your Faxes with the eFax Message Center

eFax Message Center provides several tools to help you better organize your faxes for easier search and retrieval later.

To search for faxes stored in your eFax account:
  1. Log in to eFax MyPortal.
  2. Click View Faxes.
  3. In the Search field, type one or more keywords or tags.
  4. Click Search Faxes. A new tab will open in the Message Panel and display your search results.

You can also search for faxes from the eFax mobile app.

Tags are keyword categories you apply manually to your faxes in eFax Message Center to easily organize and find your faxes when you need them.

You can customize tags to fit your needs. You can create a tag for “signed contract,” for example, and append this tag to all faxes that include a signed contract. This way, when you need to find these faxes, you can simply search for the tag “signed contract.” You can add tags to any fax stored in Message Center, and add multiple tags to each fax.

Note: If you implement the optional Enhanced Security feature on your account, the tagging function will be disabled.

To add a tag to a fax:
  1. Log in to eFax MyPortal.
  2. Click View Faxes.
  3. In the message list, check the box next to each fax you’d like to tag.
  4. Click Tags in the Message Center toolbar.
  5. In the Create Tag panel, type in the Tag Name field, and click Save.
  6. Repeat for each additional tag you’d like to add.

Note: Tags are not case-sensitive: HOUSE is the same as house.

To view or remove tags from a fax:
  1. Log in to eFax MyPortal.
  2. Click View Faxes.
  3. In the message list, check the box next to each fax you’d like to tag.
  4. In the message list, check the box next to the fax whose tags you’d like to see.

Note: You can do this with only one fax at a time. To remove a tag, in the Edit Tag panel, check the box beside the tag and click Remove Tag.

Within eFax Message Center, you can further organize your faxes by grouping them into folders, using either the system’s standard folders or custom folders you create.

Note: Your Message Center will always have the following default folders (and they cannot be deleted or renamed):

  1. Inbox: Contains your received faxes
  2. Signed_Docs: Contains a copy of each fax you’ve signed or commented on in Message Center.
  3. Trash: Contains faxes you’ve moved from other Message Center folders
To create a new folder:
  1. Log in to eFax MyPortal.
  2. Click View Faxes.
  3. In the Message Center Folders panel toolbar, click New.
  4. Type a folder name in the Enter new folder name field, and click Create Folder.
To rename an existing folder:
  1. Log in to eFax MyPortal.
  2. Click View Faxes.
  3. In the Message Center Folders panel toolbar, click the folder you’d like to rename, and click Rename.
  4. Type a folder name in theEnter new folder name field, and click Rename.
To delete a folder:
  1. Log in to eFax MyPortal.
  2. Click View Faxes.
  3. In the Message Center Folders panel toolbar, click the folder you’d like to delete, and click Delete.
  4. At the Delete Folder confirmation, click Yes.

Within eFax Message Center, you can move or delete faxes, add tags to your faxes, and search for faxes sent or received through your eFax account.

To move a fax to another folder:
  1. Log in to eFax MyPortal.
  2. Click View Faxes.
  3. Check the box next to the fax(es) you’d like to move, and click Move in the Message Center toolbar.
  4. In the list of folders that appears, click the destination folder name.

Note: You cannot move faxes into or out of the Sent or Signed Docs folders.

To delete a fax:
  1. Log in to eFax MyPortal.
  2. Click View Faxes.
  3. Check the box next to the fax(es) you’d like to delete, and click Delete in the Message Center toolbar.
  4. At the Delete confirmation, click Yes.

Note: Faxes deleted from Message Center are not placed in the Trash folder and cannot be recovered.

You can view a summary of activity on your eFax account, as well as detailed activity logs for each of your fax numbers, at any time. To access the Usage tab, just click Account Details in the header on your eFax MyPortal page.

On the Usage tab, you’ll see a summary table with the following information:

  1. Current Plan – Displays the current eFax service plan for your account.
  2. Receiving Faxes – Displays the number of fax pages you have received since the start of the billing cycle (for a single fax number on your eFax account).
  3. Storage – Displays the time period for which faxes will be stored in Message Center.
To view detailed Send and Received Fax Activity Logs:
  1. Log in to eFax MyPortal.
  2. Click Account Details.
  3. Click the Usage tab.
  4. Click the Activity Log.
    The Logs page displays fax activity, including details of the Date, number of Pages, Duration, and From (sender’s fax number).
  5. To display activity for a date range, select From and To dates, and click Go.

Send & Receive Faxes from the eFax Message Center

eFax® automatically stores every fax you receive through your account, keeping them securely in the cloud for the life of your account. You can easily access old faxes from the Message Center, and search for a fax by date, keyword, or tags you can manually apply to your faxes. Plus you can view fax usage within the Account Overview Page.

Note: If you implement the optional eFax Protect feature on your account, the Search function will be disabled. Additionally, Search will work only with English-language keywords.

To read faxes in your eFax Message Center:

  1. Log in to eFax MyPortal.
  2. Click View Faxes.
  3. To open a fax, click the Subject.
  4. Open the fax attachment by clicking the View Fax file name link at the top of the fax preview. display.
  5. Click Downloadin the Message Center toolbar to save the fax to your computer.

In the Message Center, you can search for faxes by keywords or any tags you’ve applied to your faxes.To search for stored faxes:

  1. Log in to eFax MyPortal.
  2. Click View Faxes.
  3. In the Search field, type one or more keywords or tags.
  4. Click Search Faxes. A new tab will open in the Message Panel and display your search results. You can search for keywords in the fax headers, fax documents, or any tags you’ve applied to your sent or received faxes.
  5. To search, simply type the keyword(s) in the Search box in eFax Message Center.

Note: Tags are not case-sensitive: HOUSE is the same as house.

To view a sent fax in Message Center:

  1. Log in to eFax MyPortal.
  2. Click View Faxes.
  3. In Message Center, double-click the Sent Faxes folder.
  4. Locate and click the sent fax you’d like to view.

Send a Fax From MyPortal Message Center Using the Websend Form

  1. Log in to eFax MyPortal.
  2. Click Send Faxes.
  3. In the Websend popup, type your recipient’s Name and Company.If you’ve added Contacts to your Message Center Address Book, a list of matching Contacts appears as you type. Select a Contact, and eFax auto-completes the recipient information.
  4. To access your Message Center Contacts directly, hover over Choose From Contacts until the list appears. Select a Contact, and eFax auto-completes the recipient information.
  5. In the Select Fax-To Country, select your fax’s destination country.When sending to international numbers using eFax, you do not need to include the “0” before the number.For example, if you want to send a fax to the UK number +44 (0)20 7555 1234, you would select UK (44) from the Select Fax-To Country list, and then type 442075551234 in the Fax Number field.
  6. If you didn’t select a Contact, type the recipient’s Fax Number.
  7. To include a cover page, check the Include Cover Page box, and type the Subject and Message in the fields provided.
  8. To select a document to fax, click Browse, select a file on your computer or Internet device, and click “OK”. The name of your document appears in the Attachments box (Repeat to add up to 10 documents/18MB max).
  9. Optional: Type a Reference ID.
  10. Optional: From the Send Receipt list, select the email address for eFax to send your delivery receipt (otherwise, the receipt will be sent to the Default Send Address set in your Account Preferences).
  11. From the Select Quality list, select a resolution for your fax.
  12. Click Send Faxes.

eFax Message Center makes it easy to add comments or notes to faxes you’ve received. You can add as many text comments as you like to any area in your fax documents.

  1. Log in to eFax MyPortal.
  2. Click View Faxes.
  3. In the Message Center, check the box beside the fax to which you’d like to add comments.
  4. Click Sign in the Message Center toolbar. The Electronic Signatures popup will open and display your fax.
  5. Navigate to the page in your fax where you want your comment to appear.
  6. Click Text in the top toolbar
  7. Type your comment text in the red comment box.
  8. Drag the sides of the red comment box to resize and reposition as necessary.
  9. To increase or decrease the font size of your comment, hold the mouse over the red comment box, and the gray toolbar that appears click the plus (+) or minus (-) sign.
  10. When you’re done, click Save in the top toolbar.

eFax will automatically copy the commented version of the fax to your Message Center Signed_Docs folder.

Tip: To email or fax your commented fax without saving, click Email or Fax in the top toolbar.

Note: If you implement the optional Enhanced Security feature on your account, the comment feature will be disabled.

Anytime you send or receive a fax with your eFax® service, all of the information relating to that fax are automatically stored online for the life of your account. You can retrieve them anytime through your eFax Message Center.

How to Turn on the eFax Storage Feature

To activate the free online fax storage and retrieval features:

  1. Log into eFax MyPortal.
  2. Click Account Details.
  3. On the Preferences tab, in the Display Messages section, click Edit.
  4. Select Yes and click Update.
Once Activated, You Can Access Your Faxes Online

To read faxes in your eFax Message Center:

  1. Log into eFax MyPortal.
  2. Click View Faxes.
  3. From here you can order your list of faxes by date, sender or other filtering parameters; or search for the desired fax by date, sender or keyword.

eFax® gives you several ways to easily forward copies of your inbound faxes. You can send a copy of a received fax either by email or by fax directly from your eFax Message Center.

Fax a Copy of a Fax with eFax Message Center
  1. Log into eFax MyPortal.
  2. Click View Faxes to be taken to the Message Center.
  3. In your Inbox folder, check the box beside the fax(es) you want to forward.
  4. Click Fax in the Message Center toolbar. The original fax will automatically be added as an attachment in a blank Send a Fax form. If you forward multiple faxes, each will be added as a separate attachment.
  5. Fill out the recipient’s Name, Company, and Fax Number.
  6. If you want to include a brief message with the forwarded fax, check the box next to Include Cover Page and enter a Subject and Message.
  7. If you want, you can add other attachments, as well.
  8. Click Send Fax.
Email a Copy of a Fax with eFax Message Center
  1. Log into eFax MyPortal.
  2. Click View Faxes to be taken to the Message Center.
  3. In your Inbox folder, check the box beside the fax(es) you want to forward.
  4. Click Forward in the toolbar.
  5. In the Forward Faxes pop-up, enter the recipient’s email address in the box provided.
  6. Click Forward.
  7. If you want, you can add other attachments, as well.

Note: When you forward multiple faxes at once, each fax will be sent as a separate email.

Experience the Benefits of Online Faxing Today​